zaterdag 27 april 2013

Finally understanding bird wings - hopefully...

After the first animation test, all the extra bird anatomy study, more action analysis of folding wings and so on I still was puzzled about a very basic element of its structure... I'm not even too sure now what confused me the most, probably just the many angles and twists the wing makes to be folded, that made me overlook some things. In many drawings explaining the bird's skeleton it is visible that the arm is going down in an angle and up again. In the wing itself you don't really see this though. Now, after some more anatomy study I figured out that there is a muscle between the upper and lower arm that makes this invisible, and therefore confusing. Another reason why I couldn't figure out how it worked was that I was convinced about certain angles of things. I designed my wing so that the upper arm can fold backwards so the elbow will be at the back and wrist at the front, as it clearly happens when a bird folds its wings. I thought from here the feathers should keep facing down, although pivoting slightly more backwards as well, especially the primaries. I thought that if the elbow would face downwards and then be shifted backwards to be folded, that it couldn't work because the feathers would be horizontally suddenly. What I forgot to consider though is how every part would be shifted, as well as the body of the bird. The feathers actually have to be turned backwards, and because of how the shoulder joint moves and the body is positioned, everything then fits nicely in its place. This probably all sounds quite confusing and complicated when trying to explain it in text. That is how I felt trying to visualize it for myself, but not being able to fully analyse what was happening from video reference, not sure how to relate this to the anatomical drawings I had, and finally not able to perform the exact actions I could perceive with my armature so far. Until I finally got it after looking at the most simple diagram in a whiteboard animation video on youtube, aimed to explain bird flight understandable for kids.

Diagram how bird wings work. Source: http://www.youtube.com/watch?v=3So7OMwNgy8
Even though so simple, and many drawings I had seen so far should have explained the same concept, only now it made sense to me. I think possibly because it was the first clear top view showing the muscle and bone structure at once, but finally now I could understand how the wing should fold. I also see now that it probably had confused me from drawing my scale drawings from a front view, which would actually be the bottom of the bird and thinking that from there the wings should fold backwards, while actually it would look like they were folding sideways/up and down from the front, which in flight position would look like back and forwards. Oh well... what is back, side and front for a creature flying freely through the air? Clearly a lesson to define that better for myself next time... Anyway, this time I don't think I will have to re-design the entire wing, but can get away with just changing the direction of the hinge joint be re-soldering, and also adding an extra ball joint at the shoulder joint so it will be able to move more freely in all directions, which is quite important for this joint and I think was too limited with just one single ball joint...

I drew out the new adjustments in a new scale drawing, also incorporating other changes I've made along the way, and some new thoughts about the tail, where I'm now applying a similar mechanism as to the wing feathers. I made some pictures of the scale drawings, hopefully can make a better scan of it soon, but it hopefully makes some things clear for now.

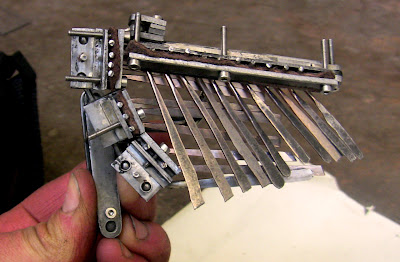
Close up of the new wing design.

Full bird scale drawing - (not ultimate quality image).

The other elements except the adapted wing design which I incorporated in this new scale drawing are the new design for the leg attachment, as how I sketched it roughly some time ago. Also I skipped the k&s at the feet part of the legs. I thought I needed them to be able to separate the feet when casting them separate from the rest of the body, but now realized that I can still easily detach them, as it is just a matter of unscrewing the hinge joint... I changed the fanning mechanism for the tail as mentioned above and changed the direction of the joints for the middle body parts, which I had already figured out before and applied on the armature, but is still shown different in the previous drawing. I also thought again about the positioning and direction of the tail joints and decided that to have the most options with quick twists and bends I should have one joint facing sideways and one the other way around, so I can have both free movement up and down as well as sideways. I also worked out the facial mechanism on here this time, which I had only done roughly from one side before, and the different viewpoints only in a rough sketch. I changed some things from this sketch also, after studying the bird's skull anatomy more. I hope this design will make sense when I start building it... hopefully it will require less versions then the wing... So far it's designed to have an opening beak, also some up and down movement of the upper jaw, movable eyelids, an attachment point for tongue (will be wire in k&s) and then the joint to the neck. Or so is the plan right now at least...


vrijdag 26 april 2013

anatomy study - notes to myself

These are just a collection of notes to myself from my further research into birds, and thoughts about them about how to or not to incorporate the knew knowledge into my armature design. Sometimes I get a bit carried away perhaps in details and subtleties which would in case this puppet would be for a specific production with a time/budget/etc. limit, and a certain purpose for the functioning of the puppet, not be necessary to figure out. In this case it was interesting and felt meaningful to learn a bit more about anatomy, to also get a better understanding of what I'm trying to achieve with the armature in general.

* primary feathers separate and turn, but secondary feathers don't.
Do they still pivot as a whole though? I designed my wing's  secondary feathers to be able to move and separate though I knew it would need less movement then the primaries, still it seemed necessary to have them able to move somehow during the folding of the wing. It is hard to exactly analyse it when watching moving birds as it is all so much hidden behind/underneath other feathers, etc.

* During a downstroke feathers overlap in such a way that they provide a firm boundary layer that air can't pass. Then, on the upstroke, feathers separate and the wing turns, so that air is flowing straight in between them. (youtube 'how bird wings work (compared to airplane wings) - smarter every day')
My wing design doesn't allow for real twisting of the feathers, at least, I think I would still be able to get enough of this subtle movement with the end of the feathers which will be wire, if necessary.

* Birds have a light tail (mainly feathers, only very short bone part), which makes that their center of gravity is in between the wings.
This is an interesting fact also to think about for the balance of the puppet... It is quite likely that for my puppet the center of gravity, and so also the puppet's balance, will be nearer the wings then the tail. Originally I had planned the rig attachment points to be nearer the hips, as I thought it would make the rig be less in the way with the flapping wings, and easier to hide. But this fact makes me consider again, if I shouldn't place it nearer the wings, so it works better with the balance of the puppet... Maybe I could attach it near the wings, but then let the rod/metal bar go in angle, leading first along the body more downwards, so the point where the rig will be actually attached can still be in a more convenient place to be out of sight. Perhaps I should just leave this decision to the last moment when I have most of the puppet done and can judge it more easily.

* Birds have a compact and centralized bodyplan around their centre of gravity between the wings. The main flight muscles are located at the body midline on the breastbone (which is why birds have large chests).
I'm just wondering now if I made the chest of my bird wide enough... I couldn't figure out exactly how the proportions work. I think together with the shoulders continuing into the wing parts I will have the right proportions, or something close hopefully. 

* Birds have large eyes, the largest part of the skull is reserved for the eye sockets.
Took this into consideration when designing the skull. I may need to make them slightly smaller in order to have the joint at the top of the head for the moving upper eye brows fit in nicely within the proportions without making the head too big.

* Looking at the chest of birds, their 'pectoral girdle' (part with collar bones and chest plate, but separate from rib cage) 'floats' within muscular support separate from the ribcage, so it can slide back and forth over the surface of the ribcage as the motions of flight demand. (Proctor & Lynch, 1993, manual of ornithology)
I found this to be a quite interesting discovery... Would this mean that I can actually never reproduce the full range of movement a wing/bird shoulder can make with my design so far? Would it mean that to actually achieve this it would be necessary to design some sort of chest structure that can move separately from the backbone/rib cage? Of course, at this point I would also need to reconsider what my actual aims are. Which is not to reproduce the exact anatomy and functioning of a real bird, but to make an animated character. In 9 out of 10 situations these sort of subtleties would definitely not be necessary in the puppet. Although my aims are here to create an accurate moving bird armature, this may be a step to skip, perhaps something to have fun with another time. I couldn't help though to have a little fun working out a possible solution, if my rough sketches make any sense:


* In a bird wing the elbow and wrist are in such a way connected that extending the elbow automatically also extends the wrist... This simplifies the co-ordination for the bird.
And also the co-ordination of the animator moving the bird... Good idea, nature is fascinating... But even more complex to build. I think for now I just need to learn coordinating the bird's wing in the right way when animating, but interesting to know, and perhaps consider such kind of mechanisms for any future armature projects...

* flight feathers are asymmetrical: the leading edge is narrower and less flexible the the trailing edge. This is to avoid twisting and damaging and ensures upward bending of the feather during the downstroke.
You can see this of course when looking at feathers, but good to be reminded of, also as it may help the actual functioning of the feathers as well if I design them like this for the puppet too.

Thinking about fanning mechanisms


For a long time I couldn't figure out the right way to go about the fanning mechanism, so I decided to study my new 'manual of Ornithology' a bit more to find out how it works in the real world...

In real bird anatomy, birds have individual muscles to each individual flight feather, which are pretty intricate and precise and lay on top of each other slightly. The feathers are attached to the 'postpotagium', which is a tough band of 'tendinous tissue' from the elbow to the wing tip. This postpotagium forms the leading edge of the wing and with its elastic strength 'keeps the flight feathers properly aligned and firmly attached to the wing skeleton.' (Proctor & Lynch, 1993).

I got a bit confused actually if the feathers are actually directly attached to the bones or if they are only held by this muscle structure. If I'm right they're still attached to the bones, but mostly held in place by the tendinous elastic structure. This is quite interesting, as so far I have been mainly considering moving mechanisms within the 'rigid' armature parts I have been making, while I had already been given the advice earlier to also consider the properties of soft materials having a role in the moving and functioning of the armature. I was considering to link up the feathers with metal rods, as I thought it would provide both a pull effect when opening the feathers, and push effect when closing the feathers. But, being rigid material it would have caused problems where the wing should fold, and also make the movement of the wing be quite limiting.
I did a test using stretchy fabric, quite crude for now, but the principle seems to work. I sewed it just around the feather rods, but when I get some holes in them I could fix it more to one place. I think I should try it with bandage instead of the legging stuff I used. Ideally something that is strong and a bit stiff, but still flexible enough... If I can find the right material I think it would work quite nicely... I will have to work out the right spacing between the feathers (which will be easier to judge when I've put the final extended feathers on) and then make sure the fabric can stretch the right amount so the feathers can open and close as far as they should and not further.

Fabric test for fan mechanism


zaterdag 20 april 2013

First animation test with new wing!

First time animating the new wing! I really need to get back into practice. It is pretty messy and I know I can do much better. But as much as it is the first time I've made ball and socket joints, it is also the first time animating with them. I'm happy with the folding movement so far, and need to pay more attention to all details next time. Also need to improve the setup in my room as I was looking at the screen from a distance, which didn't help in noticing all little details. Most important to study some moving birds again and prepare before animating with some sort of dope sheet or at least good notes for myself. I noticed when working on our 'fowl play' stop motion short earlier this year what a world of difference this can make...

Definitely want to get the fanning mechanism in place soon as well, and maybe already attach some primary & secondary feathers to the rods for the next test. If I can get my screen closer to my work and do some preparation before the next effort, then hopefully there will be lots of improvement.

One other thing I noticed during animating is that I will have to be really careful handling the shoulder joint. It is important that this joint is tight, as otherwise it can't hold the weight of the whole wing. But at the same time it need to be possible to animate it smoothly, as a small movement at the side of the shoulder will mean a large movement at the tip of the wing. So I need to be able to make really small and precise movements with the shoulder joint... Best I can do now I think is using two hands and grip the chest part firmly when moving the joint carefully.


maandag 15 april 2013

building week 7 - completing new wing and middle body part

A week of encountering many problems again, and finding solutions for most of them... Meaning in some cases re-designing part of my new wing design again, and changing back to some part of the old design.

While I was working on the first joint for the 'hand' of the wing I realized another couple of mistakes I had made. I had designed the attachment for the ball joint plate + pivoting feathers both at the front (see scale drawing some posts back) with the idea that it would allow the joint to be a bit thinner as a whole. However, at the same time it would get in the way when turning for the folding of the wing. Another mistake was that I had made the lower part for the pivoting feathers sticking out at the side. It made sense when I designed it first, but now I noticed it would really affect how much the joints could be turned. I re-designed it making it square again, but slightly longer at the ball joint side, slightly shorter at the pivoting joint side.
I tried to find a way to solve the problem of the clamp part being in the way at the front, and after thinking of two complex solutions decided that it would be fine to have that part at the back. This would make the whole joint a bit thicker as it would have things sticking out at two sides, but solving a lot of problems too, so worth that sacrifice.

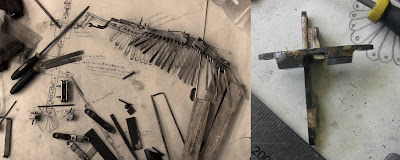
Changing the joints, early design in progress at top,
finished joints with changes below.

Silver soldering still is something I need more practice in clearly. I had plenty of opportunities this week, and still been getting it wrong plenty of times. Expensive practice... but hopefully I'll get better at it soon. Also a time consuming practice, as every time getting it wrong means cooling down, cleaning up and setting up the parts again in the right position with flux and solder, etc. and if it goes wrong again doing all that again, and again, and...

Then I found another major mistake in the design. I had already made the ball and socket joint between the upper and lower arm (elbow) and soldered it all together, then went testing its movements. I had deliberately changed this joint as I thought the hinge joint was too limited in its movement. I was really puzzled about this for a while, even wondering if birds maybe had some different type of more flexible joint here. A silly thought really, but I thought at least it 'wouldn't harm' having some more moving possibilities. I thought the turning around of the elbow would make things easier, as it looks when turning around your arm as if something in your elbow is moving too. Duh! It's the skin that is moving of course, not the bones... What I thought would give more flexibility was actually limiting the joint more now, as the ball and socket joint would not allow to be folded entirely. I was still believing that I could adapt it a bit for a while, but actually messed it up only more in that way. I was trying to file parts away to allow more movement, but I soon realized that it was just not going to work. I remembered now that I had not been able to fully judge the movement of the old wing design as there was no shoulder attached then. Even though I knew this then, it must have been because of this that I got confused and made the mistake. Now it meant I had to remake this part and make it into a hinge joint again.

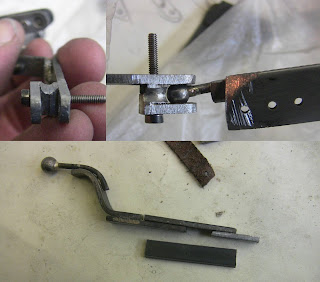
Trying to 'fix' the ball joint mistake, then changing it to a hinge joint.

The next day I continued working on the hinge joint and also re-made the upper arm plate. I had to re-melt the silver solder to use some parts again, and get them soldered to the new parts again. This day brought a lot of frustrations as the soldering kept going wrong. I could find no other way to get everything soldered then using a lot of clay near to the part I was soldering, even directly underneath it. This meant a lot of exploding clay and bits of dried clay flying onto the surface I was trying to solder. I almost lost hope when somewhere in the middle of a complete mess of clay, flux and black surface suddenly it had worked, against all my expectations. Not much later it actually seemed like the wing was coming together!

Top to bottom: setting up for soldering (one of many attempts),
The finally finished and roughly cleaned up part,
upper and lower together.

I was carefully checking all the movement of the wing this time before moving on, but this time all seemed to work fine... I continued making all the feather rods. The next thing is to find a good solution for the fanning mechanism, but other then that the wing is complete.

Testing the folding movement with the parts finished so far.

The finished wing, folded.

The finished wing, spread out.

Now, there is not much time to celebrate the success as there is not much time left before the break to get more of the body parts done so I wanted to get most out of the time I still had.
I had most parts for the middle part of the body ready to be soldered together, so I hoped to have a bit more success with soldering this time and get more done. Of course it took long again. I had noticed that the joint plates of the joint connecting the two wings was already slightly bent, or at least it looked like that. I thought it would be a good idea anyway to avoid this getting worse and make this part as strong as possible as it would be an important central part of the puppet, having to carry a lot of weight from all the connected limbs. So I decided to 'fill up' some of the gaps with metal plates, which of course was easier said then done. I had a lot of problems this time trying to solder the plates together, as I needed to clamp them together with the screw while soldering, but at the same time didn't want them to be soldered entirely together. I would still have to be able to open the joint. This meant that I had to be really careful about where the solder could flow. In most cases though the solder stayed too much at the solder and the bond wasn't strong enough. I tried soldering both side, but keeping the opening at the same place... It was really fiddly, and while trying to solder one of the hip joints the solder did indeed suddenly flow too far. I wasn't even able to loosen the screw, and then I 'screwed up' it's allen key hole by trying, so there is no way anymore now the get it out. I could try it by re-melting everything. But for now I gave up and concentrated on getting at least the chest part finished as far as possible and solder two ball bearings on the connecting part for the chest and hip part. I had it just about done except some filing and re-drilling still has to be done to have the ball bearing from the wing shoulder attachment fit in, but I can do that later at home.


Friday work, messing about with the chest part for a long time, finally soldered at right.


zaterdag 6 april 2013

building week 6 - starting the new wing

I finished the designing of the new wing over monday/tuesday as I could only access the fabrication centre again from Wednesday. So a short week for building, but nonetheless I got quite some things done.

First I continued the middle body part, trying to solder the parts together that I made the week before. That was quite a challenge... As I wanted to have the two parts for the chest to be attached in a cross shape, I needed to find a way to keep them in that shape while soldering, with the bit to connect the two staying in place as well, and then get the solder flowing in the right place without everything shifting around again... I tried to secure everything with clay again, which worked ok, but of course the longer it takes the more the clay is going to burst and shift things around again. Also because it was hard to really line up the little bit that I used to join up the two parts and make it a tight fit. It was standing quite loose, causing the silver solder to easily flow around it without connecting with both sides. As it was so small and I needed the silver solder to flow all around it I couldn't really use anything to hold it. I just had to make many efforts before getting it right, and then when it finally was stuck together it had shifted around still and the parts were not crossing entirely in the middle... I'll leave it for another time for now...


Another challenge this week was drilling through tiny bits... I needed some one side ball joints, which meant that I would have to fill up the side where the screw went through with metal, enough to avoid it from bending out at the other side, but still not too thick to not being able to clamp the ball tightly... I cut off squares of 6 by 4 mm... and tried drilling a hole of 2mm in the centre... the main challenge was clamping it. I managed to clamp it between the wooden plates in the vice under the pillar drill, which made a deep dent into the wood, so only just about the spot that I had to drill through was still visible. It looked pretty ridiculous having this teeny tiny thing clamped tightly under this enormous machine...


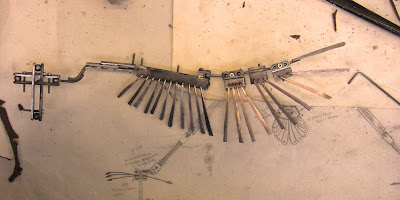
Below some images of the rest of the work I got done this week. I used welding rod for the individual feathers for this design, of which I hammered most part flat. The flat part will have holes drilled through it for connecting them with a fanning mechanism and for connecting the wire that will extend the flexible part of the feathers. Or so is the plan at least... To be continued next week. The last week before a two week break in which I can't access the fabrication centre, so hopefully I can get enough done to have at least the wing and hopefully a little bit more to test animate over the break...


dinsdag 2 april 2013

testing and re-designing the wing

I used the days I couldn't be in the fabrication centre over Easter to test animate and re-design the wing.

I only did a very short animation test. I had already noticed that I wouldn't be able to fold this wing in the way I initially planned and had researched it should fold up. I did actually do a really quick animation in between moving house where I animated without any framegrabber software but I can not share it right now as I have some problems with my editing software. It wasn't very good anyway, but I will post it here still when I can. Below is a little flapping motion test. I also need to still research and analyze the motion better for the next test, but also I need some time to get used to the armature. Some findings during animating:

* I din't have the shoulder joint attached yet to this wing. This is of course affecting how I can animate it, as normally a lot of movement would come from the shoulder joint, so in that way my animation already can not be fully correct anyway, which is a shame for testing the wing properly, unfortunately.

* The feathers at the 'hand' part of the wing should already be pointed more sideways in their natural position. Now some of them are not able to move as far as they should when spreading the wing out.

* The hand part can't fold under the lower arm as it should. It will need another joint to be able to do this.

* The metal bars for feathers should probably actually be longer at the upper arm and shorter at the lower arm (being the more solid part of the feather, at the end of the wing - even though they are also longer - they will need to be more flexible). I may have to look again at more wings in movement to check how far certain parts of the wing can and do bend.

* I will have to think more about a fanning mechanism for the feathers, where they can layer on top of each other and also follow each other when moving one.


After testing the wing I was really convinced that I wanted to re-design the wing. So I set down to go back to sketching, drawing and prototyping stage again. The pictures below show first the development trying to sketch out different ideas and putting them together, then the second picture is a quick prototype using wood and brass rods testing the main concept without clamping plates.

I remembered the idea with using rods instead of the metal strips I had been using from a discussion way back with Arril. He suggested that and even possibly using wood as a simpler method for the feather mechanism. I was doubting about that idea then as I was not worried that I would not be able to control the tension of the feathers and that they would move to easily just by touching, also when I don't want them to during animating. But this time I realized that this method would have another benefit: when using the rods, this would mean they would not get into each others way when pivoting and therefore also they would be able to overlap more like feathers in a real wing do. So, I quickly tested the concept as Arril had mentioned it with wood and brass rods and it moved nicely and smooth indeed, the wood provided some natural friction as well so they weren't fitting in too loosely, but still I wasn't convinced about not being able to adjust the tension and make them tighter when necessary. So I transferred my idea of a clamping mechanism as used for the first wing to this new idea. I was still considering first if I could be using wood, but then rejected this idea as I thought it would be mostly complicating things when having to combine materials. I would still need to use metal for the ball and socket joints anyway. Also, using wood would mean I would need probably thicker parts for it to be strong enough, and even though lighter then metal, metal would still allow me to work with thinner/smaller parts. So I decided to use metal, and make a clamping mechanism for the rods, which would have to be on the sides of the rod as they would come from the top. I also re-used the idea of a leather strip, which would have two purposes now: to avoid damaging the rods, but also again to even out the friction where I would not succeed in exact precision for the positioning of the rods.

Developing new ideas.


Below is the 'final' scale drawing of the new design for the wing.

New design for the wing.

It took me some frustration and more research into bird wings again before coming to a possible solution. Bird wings are still such complicated things! I'm still not sure if I fully understand their anatomy and how they work. I decided to order a book on bird anatomy as the sources I could find on bird anatomy and especially wing anatomy were quite limited. I should have a copy of the 'Manual of Ornithology - Avian Structure & Function' (N.S. Proctor & P.J. Lynch) by the end of this week...